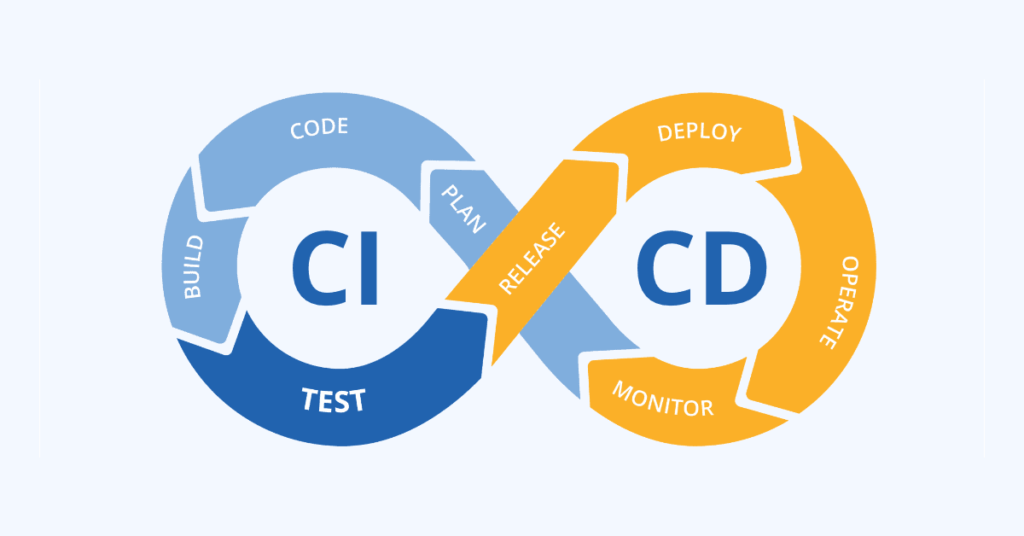
For many developers, the concept of CI/CD (continuous integration and continuous deployment) isn’t a new concept. For those who may need a refresher, I’ll break CI/CD into it’s 2 components.
Continuous Integration (CI)
CI refers to the practice of regularly merging and updating code bases from multiple avenues of development. This could be multiple developers collaborating on Code or a single developer changing multiple areas. The core goal of CI is to ensure that code changes are integrated and tested frequently with minimal impacts to production code. By implementing CI, a developer group has a better chance to catch and fix integration errors early in the development process before the issues make their way to production.
In a CI setup, developers will link an environment to a version control system (git, azure repos, etc.) and develop against what is referred to as a branch (a working version of the Main code base stored in the repository). The reason this is so integral to the development life cycle is that it ensures the following:
- Isolation from production code base: With the concept of a branch for development, developers can feel confident that their upgrades to code will not impact production without going through the checks and balances required with CI. Working branches isolate the active development and testing from committed repository code.
- Isolation from other developers: Another benefit of CI is that multiple developers can save changes in their own working branch without worry of deleting, changing, or impacting their teammates code. Isolated developer branches ensure that you can develop confidently isolated from your team’s branches.
- Ensured integration compatibility: With the build and test pillars of the CI process, when developers have finalized their upgrades they can then build and commit that code change. If builds and tests are successful, the changes are considered to be “integratable” with the main codebase. If not, developers are notified of the issues that need to be fixed.
For Data Platform builds CI is critical to responsibly upgrade code and track what changes are being committed.
Continuous Deployment (CD)
Continuous Deployment is the practice of automating the deployment of CI code changes to production and test environments. After code is successfully ran through CI, CD enables that code to pass freely between environments with varying degrees of human intervention. This enables teams to quickly and reliably release new features or bug fixes to a data platform build.
Example CI/CD setup
For reference the image below relates to a Synapse Analytics CI/CD process in Azure DevOps:

Microsoft Fabric CI/CD
But Synapse CI/CD processes is probably not why you clicked on this article 🙂 Today I’d like to detail the latest releases in Microsoft Fabric Related to CI/CD.
This week MSFT Fabric announced expanded CI/CD supported items including:
- Data pipelines – available in git integration and deployment pipelines.
- Warehouse – available in git integration and deployment pipelines.
- Spark Environment – available in git integration and deployment pipelines.
- Spark Job Definition – available in git integration
With existing coverage for the following resources:
- Lakehouse – available in git integration and deployment pipelines.
- Notebooks – available in git integration and deployment pipelines.
- Paginated Reports – available in git integration and deployment pipelines.
- Reports – available in git integration and deployment pipelines.
- Except reports connected to AAS, SSAS, or MyWorkspace semantic models
- Semantic Models – available in git integration and deployment pipelines.
- Except push datasets, live connections, model v1, and semantic models created from the data warehouse/lakehouse (direct lake)
with the list of supported microservices growing each month, this showcases MSFT’s commitment to CI/CD as a core principle of MSFT Fabric.
CI in MSFT Fabric
Configuring a Git Connection
In this section I will detail how to connect your fabric workspace to a git integration.
- First Step is to navigate to your workspace you’d like to link to git, click on workspace settings:

- A window will pop out on the right side of your screen, select the Git integration option:

- Next Populate your organization’s git repository info

- Click Select and Sync – If Prompted create the new git folder if you are creating a new one.
- We now can see that we have successfully connected to our Git integration and there are a few things to point out:
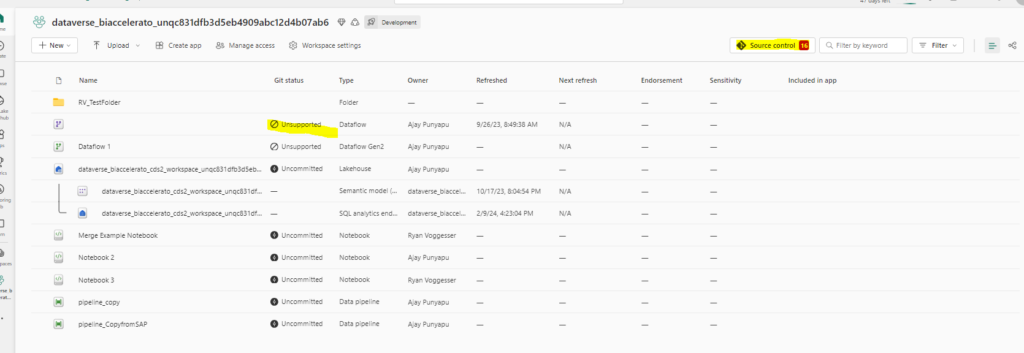
- We see that some assets are marked as “unsupported” this will be important information in a production environment as these objects cannot be repo’d. Most likely this is due to them not being a part of the CI/CD covered objects for source control. My hope is that things such as data flows will be supported in the near future
- We also see that we have 16 pending changes in our source control tab and that most of our objects are “uncommitted”. Let’s go ahead and see if we can get these objects committed into the repository 🙂
- By clicking on the source control button we see a window pop up:
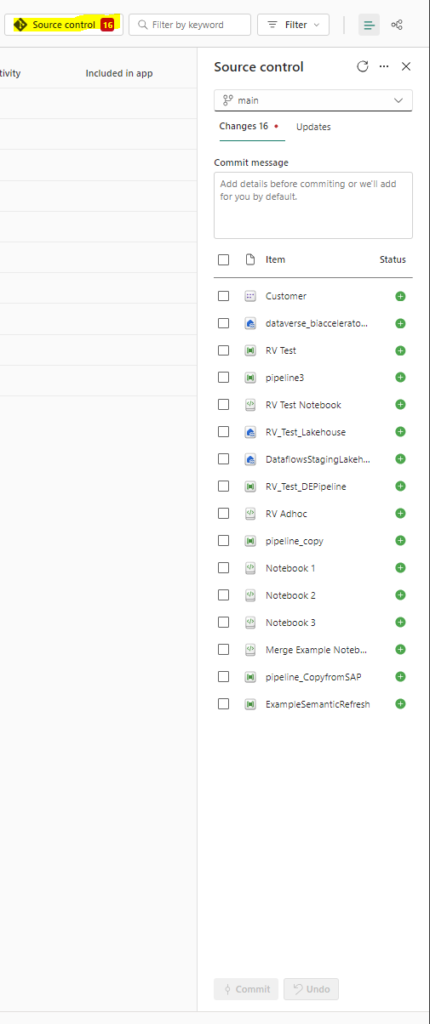
- This section shows our pending changes that can be committed to the repository. We also have the option to select what items we want to commit which is a super cool feature! Let’s select them all and hit commit.
- We now can see that we have no more pending changes and our configurations show as synced:

- Hopping into our DevOps repo we now can see that a folder has been created with all of our Fabric configurations!

Creating a Branch
Now let’s see if we can commit a change to an asset in Fabric and PR a branch:
- First start back in the Source Control section again and checkout a new branch:

- Give your branch a name and select checkout branch
- Now let’s edit a notebook and see what the PR experience is like. To start I edited a blank notebook with the following code:

- After hitting save, let’s navigate back to the workspace:

- We now see that I have one pending change. Let’s commit the change in our branch:

- Jumping back to ADO we see that the change hasn’t hit the Main Branch yet:

- That is because we still need to merge our working branch with main! We now see that the branch I created in Fabric has appeared in my repository and the notebook 2 code has been updated with my changes after we committed from the Fabric portal:

- Let’s jump to the Pull Request section of Azure DevOps repos and create a new PR:

- From here it should feel very familiar – create your new pull request merging the working branch into Main:

- We now see the merge shows no conflicts so let’s complete the merge deleting our working branch:

- Now hopping back to the main branch of our repo we can see that the change has been made in our master version of the ADO repository:

- Hopping back to fabric we see that the change has been made there as well 🙂

This simple use case illustrates how CI can be successfully implemented for a Fabric Environment ensuring that development is traceable and primed for collaboration across developers.
CD in MSFT Fabric
Now that we have gone over the CI experience in Microsoft Fabric, it’s a great segue into the CD element. Now please note – I am currently working with only a single valid Fabric workspace, but through the examples in Microsoft documentation I can speak about this at a high level.
Below is an example Microsoft Fabric Deployment Pipeline:
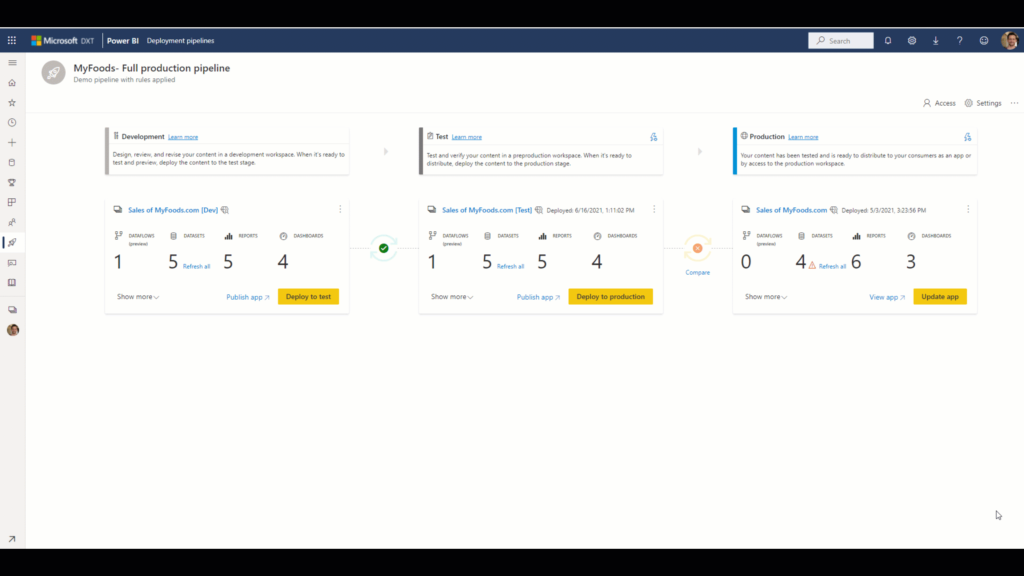
You can create a deployment pipeline from the deployment pipeline setting from your workspace tab:

This will prompt you to your deployment pipeline catalog where you will be prompted to create a new deployment pipeline:
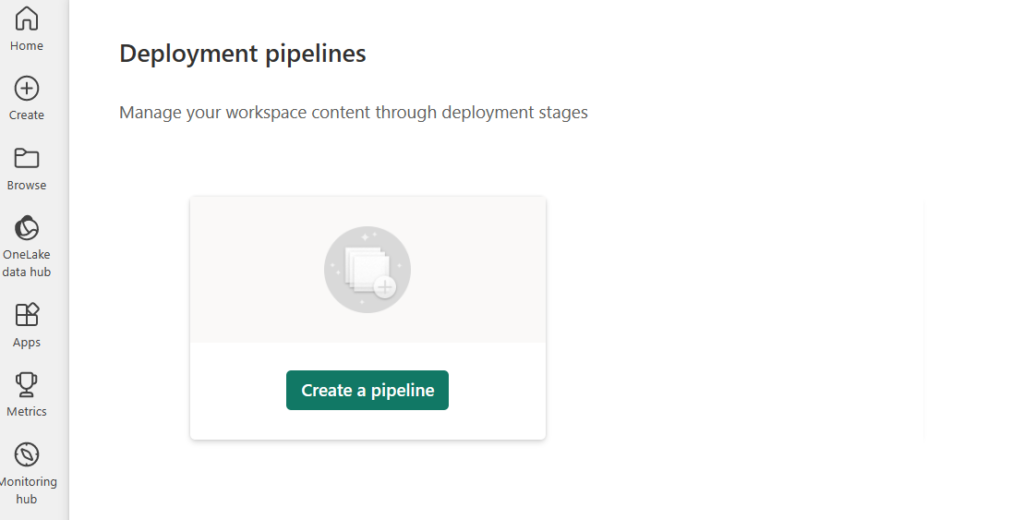

By Default your stages of environment segmentation will be Dev – Test – Prod but you have flexibility to add, rename, or remove any number of environments based on your organization’s need:

Once you click create the deployment pipeline window will appear and will prompt you to assign workspaces to your logical environments:

Once these settings are configured you will be ready to promote changes. As you develop in a particular lower level environment changes will be auditable from the deployment pipeline directly and you will have 2 options for deployment:
Deploy All Content:

This setting will move ALL changes up to the next relative environment.
Selective Deployment:
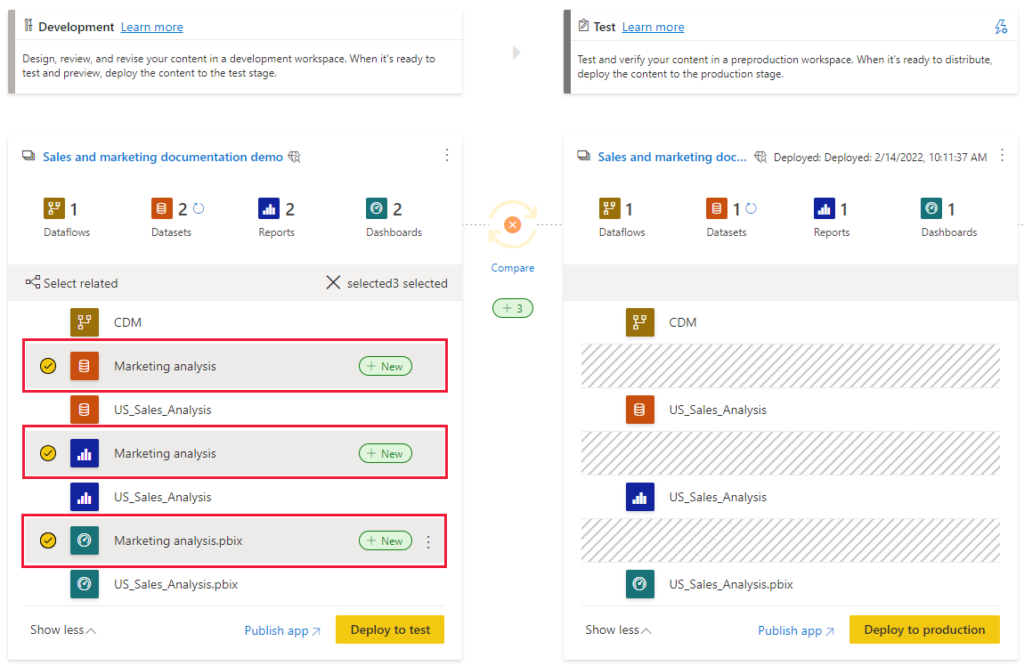
This setting allows you to select what changes you want to move up into the next environment for added flexibility.
Final Thoughts
In conclusion, CI/CD is crucial in Data Platform development as it ensures rapid, reliable, and error-free deployment of data pipelines, transformations, and analytics. By automating the integration and delivery processes, CI/CD minimizes manual intervention, reduces the risk of errors, and accelerates the release of new features and updates. Within Microsoft Fabric, the integration of CI/CD practices enhances the efficiency and scalability of data workflows, enabling teams to deliver high-quality data solutions with greater agility and confidence. What do you think of this feature? What suggestions do you have to make it better? Thanks for reading and please feel free to engage in the comments below!